GameDay's Event Landing Pages allow Event Managers to provide entrants with a public space to surface event details, registration forms, fees and more.
For Team Events, the Event Landing Page also allows you to show team lists and registered participants for each event.
Accessing Your Landing Page
There are multiple ways to access your Event Landing Page from your GameDay database.
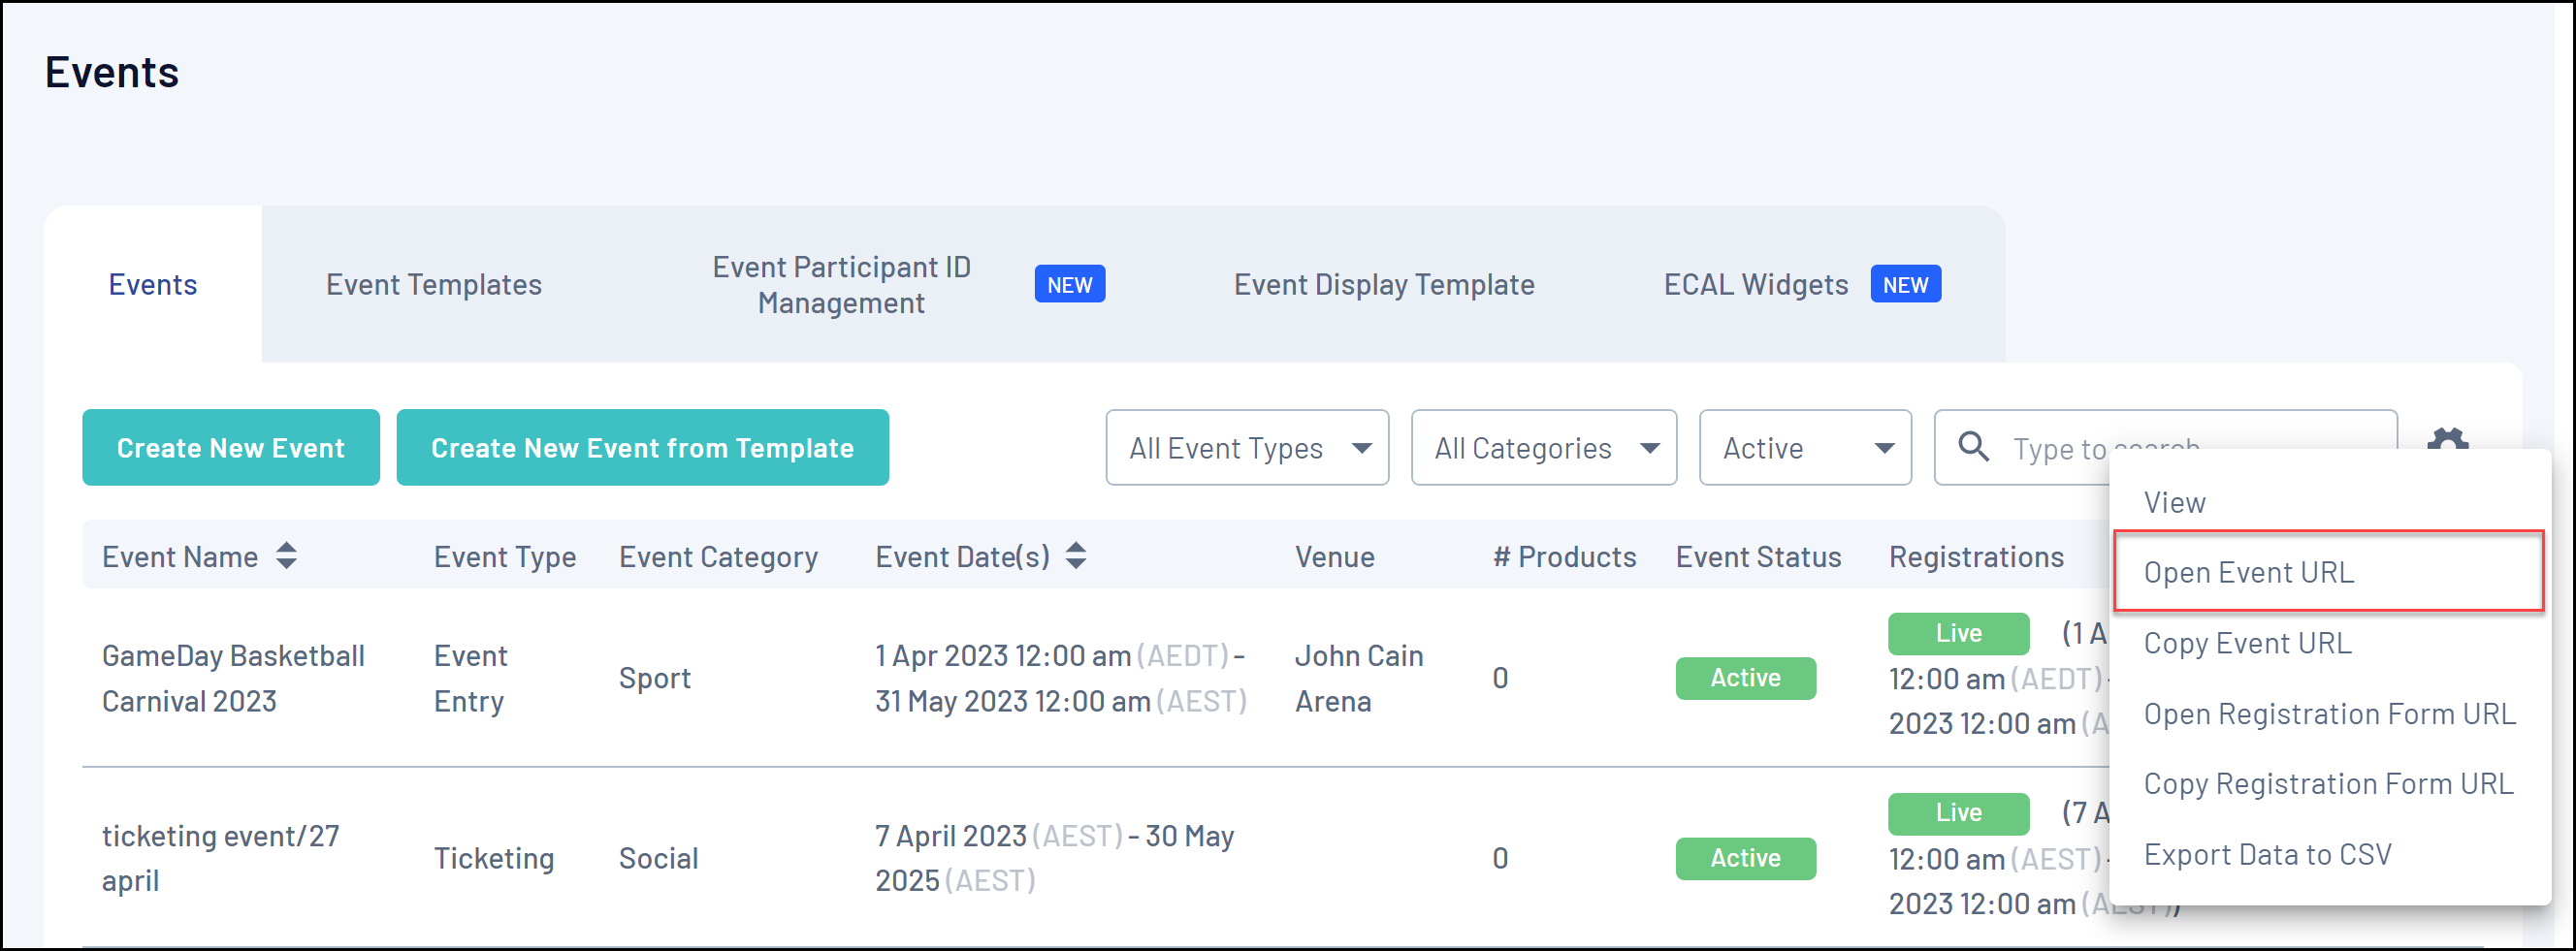
1. In the left-hand menu, click Events > Manage Events > Click the Actions Arrow for an event > Click OPEN EVENT URL
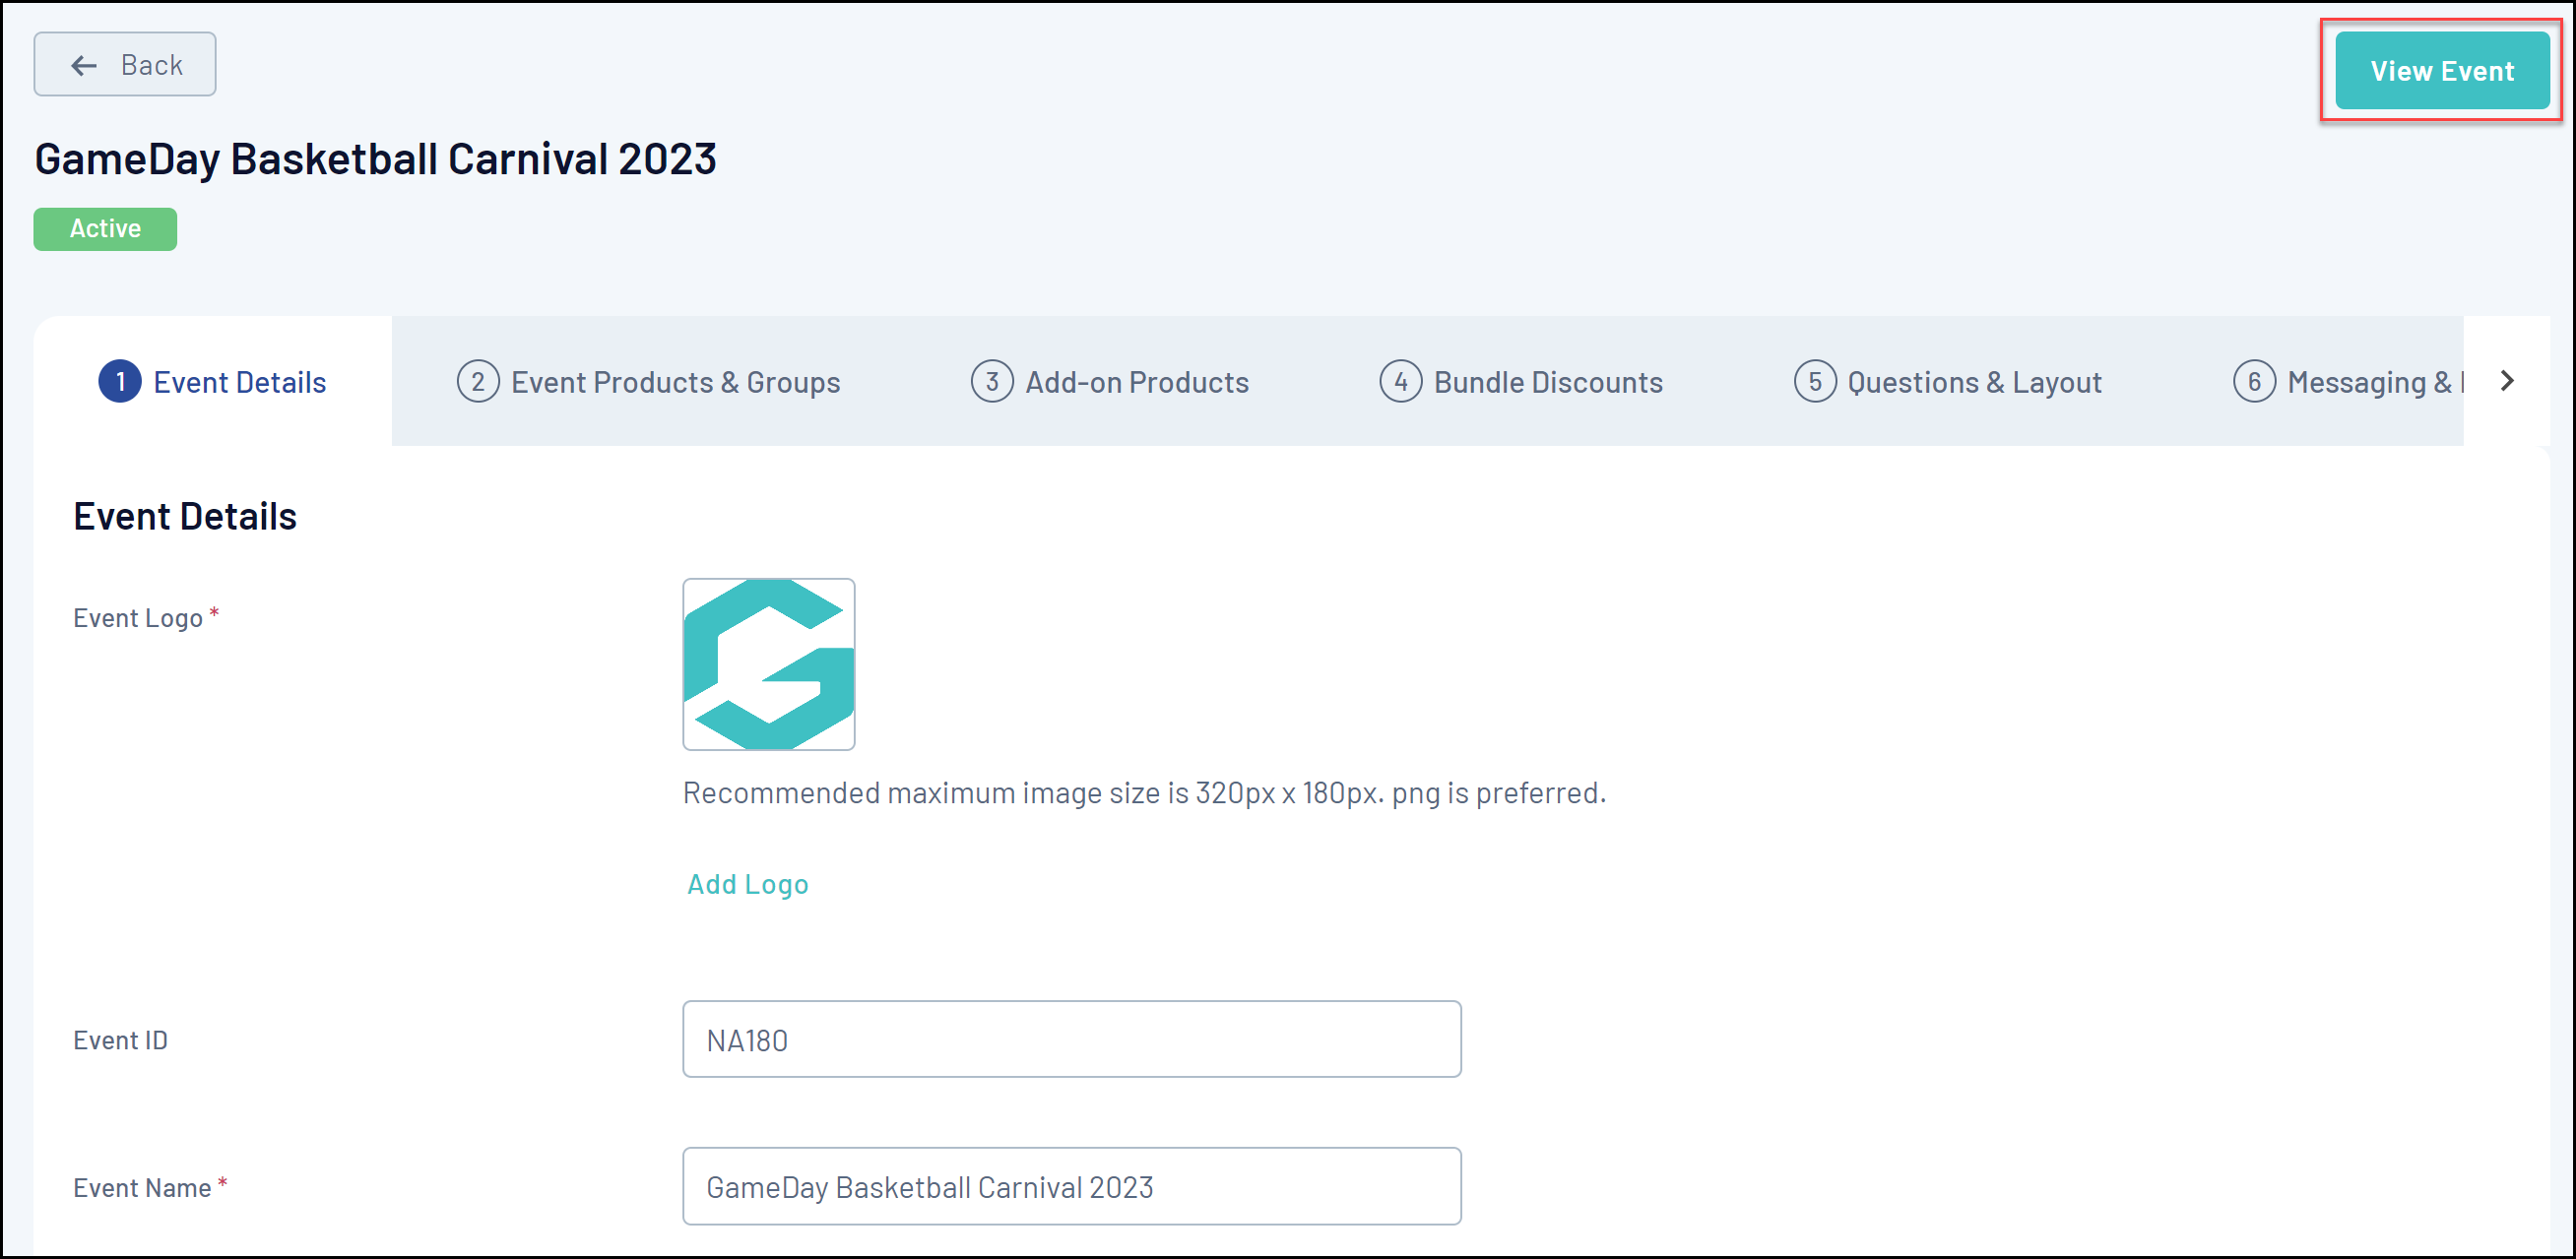
2. In the left-hand menu, click Events > Manage Events > Edit an event > Click VIEW EVENT
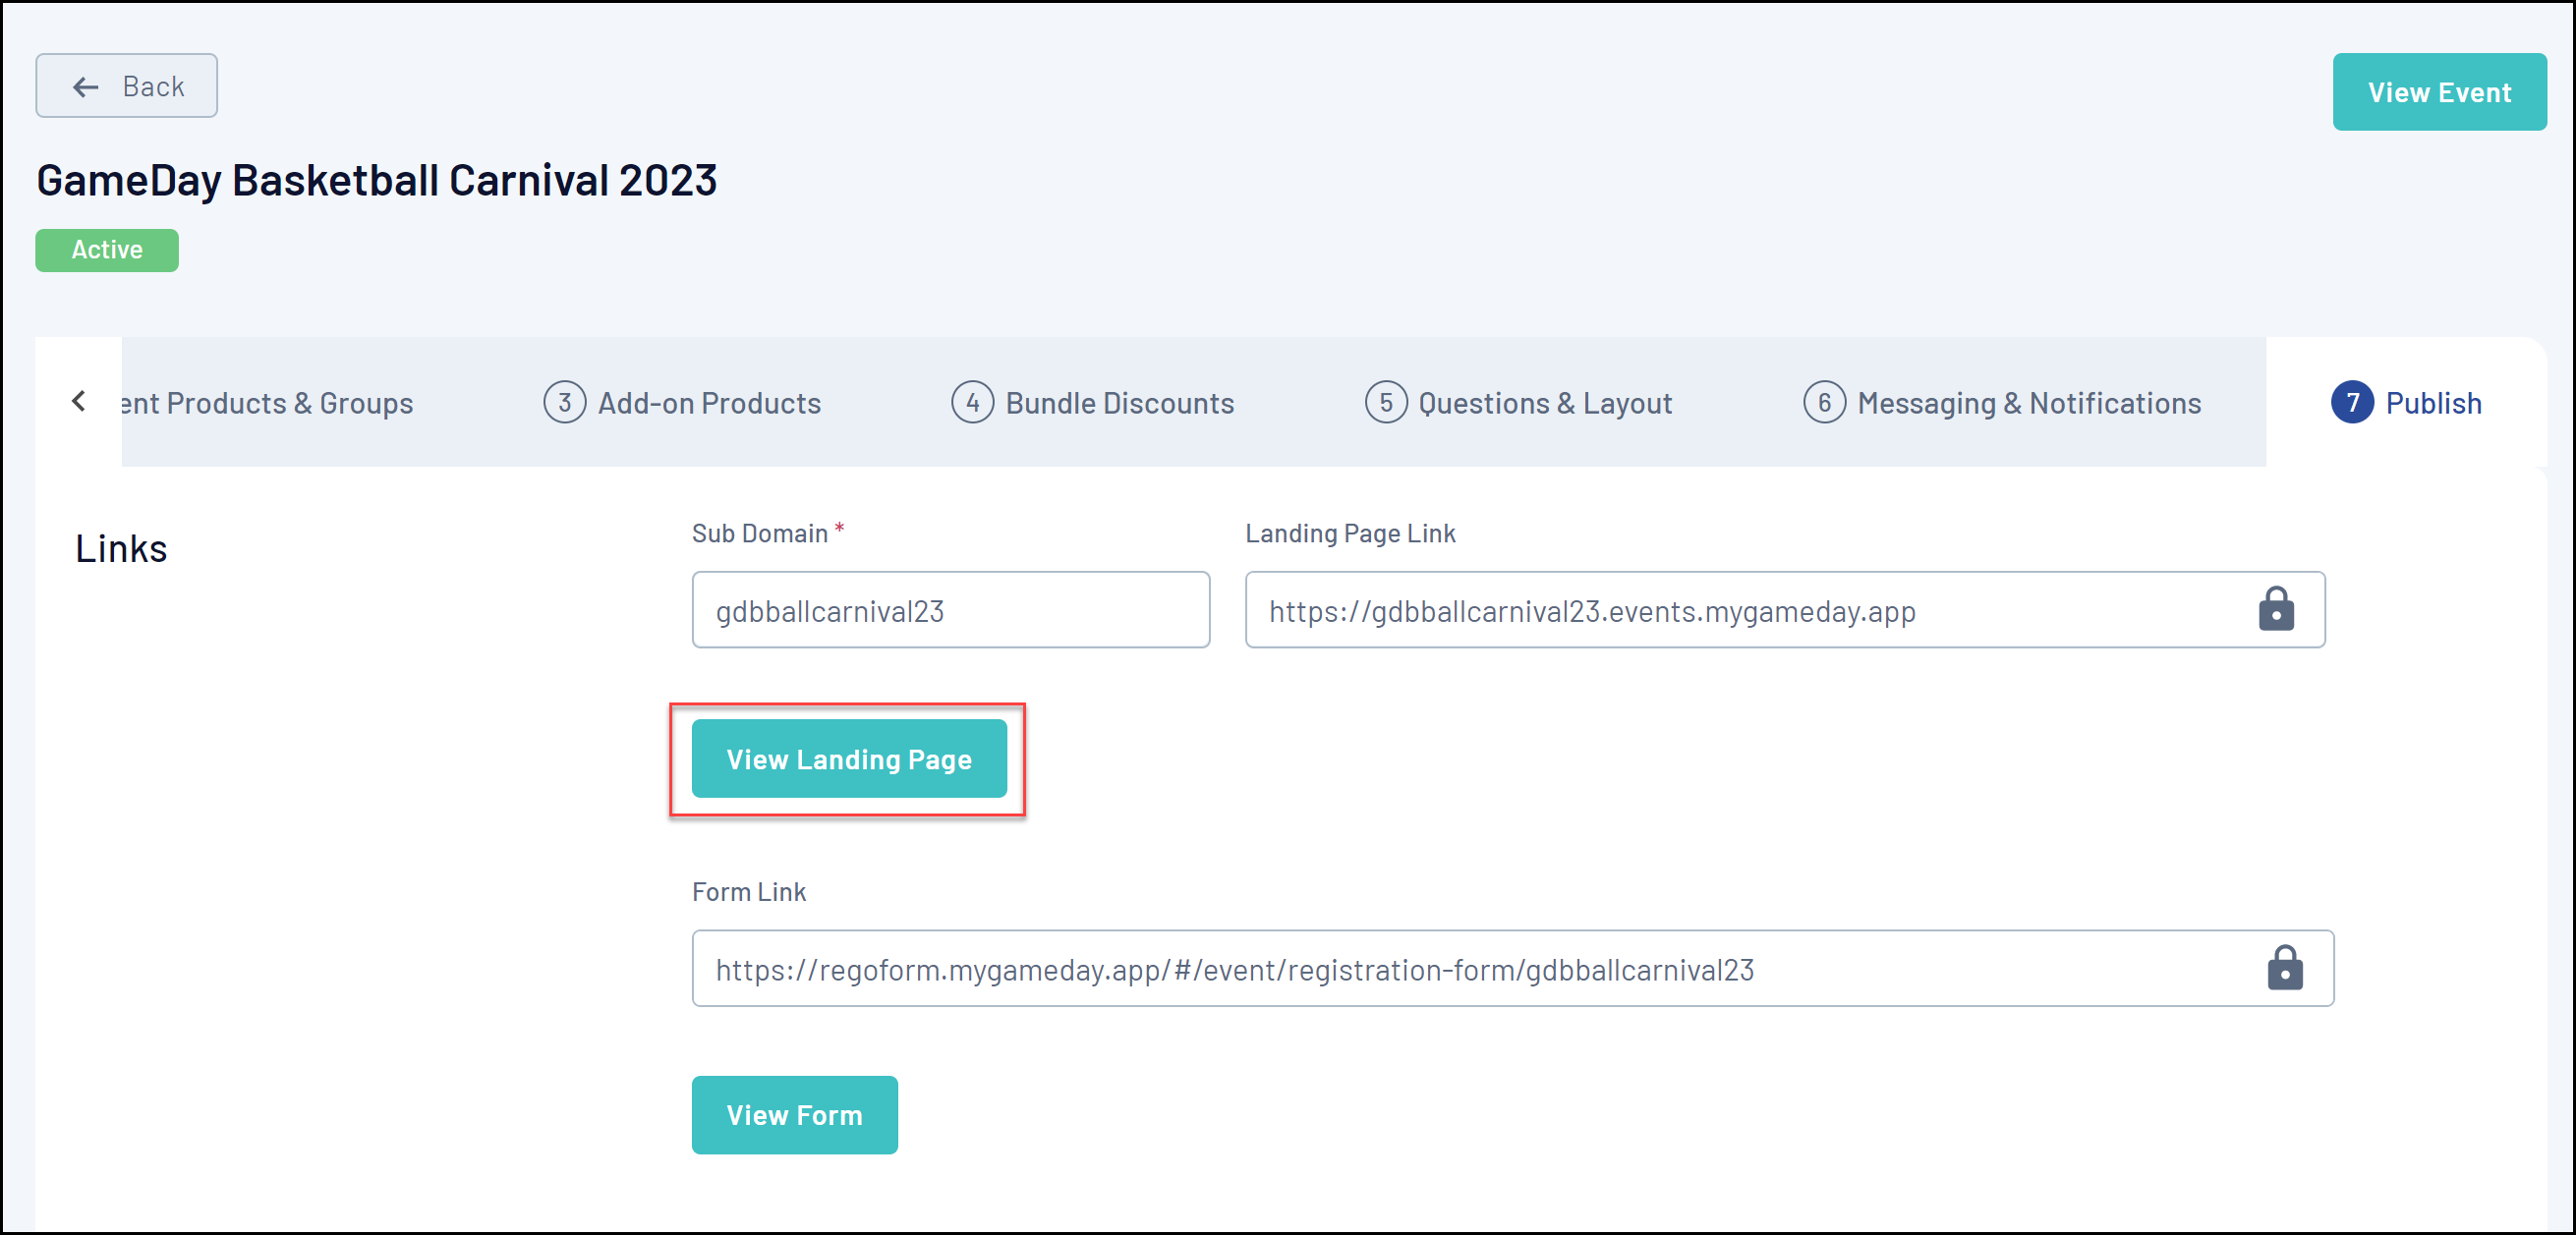
3. In the left-hand menu, click Events > Manage Events > Edit an event >Go to the Publish tab > Click VIEW LANDING PAGE
Publishing and Preparing Your Landing Page
Once you have set up your event, you will be able to generate a Landing Page through the Publish tab of your event - click here for more information on publishing your Landing Page and applying a Subdomain.
If you want to customise the look and feel of your Landing Page, you can do so using the Event Display Template - click here for more information on configuring your Event Display Template.
Landing Page Features
Your Landing Page includes a number of features including:
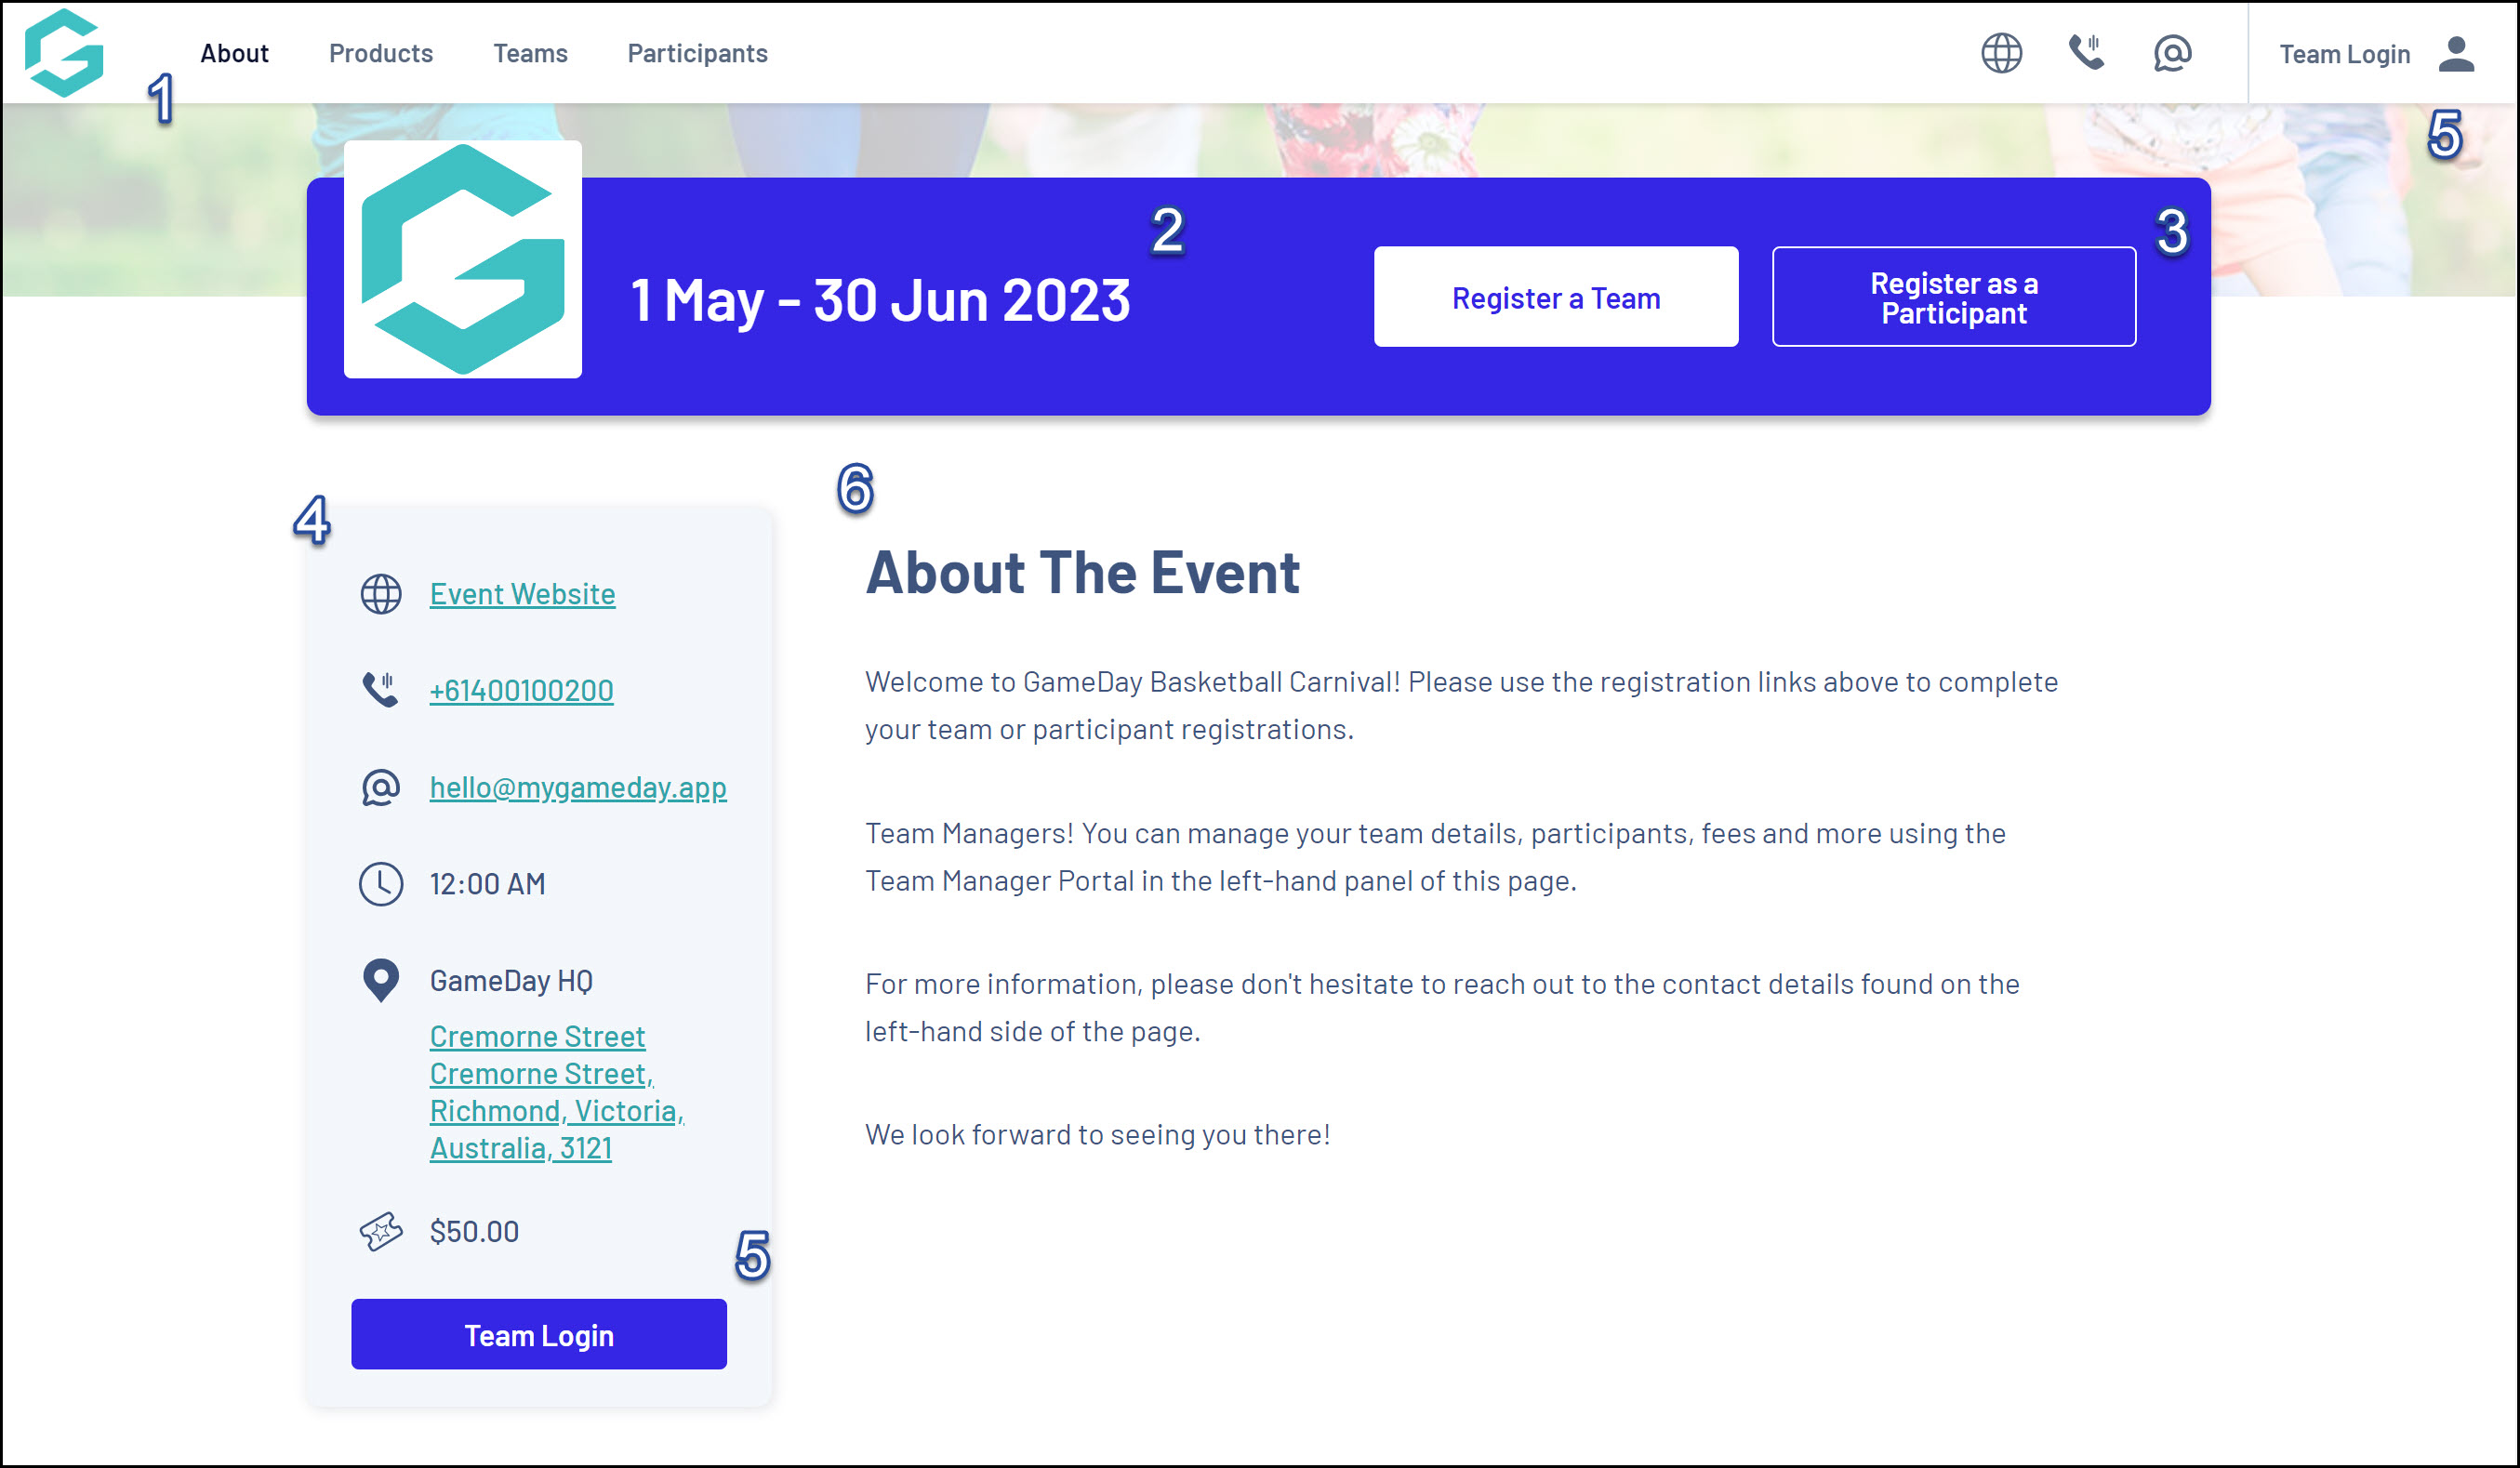
1. Navigation Menu
- About: Shows the Event Description on the central panel.
- Products: Shows all available Products for this event on the central panel.
- Teams: Shows all the Teams that have registered for the event in the central panel.
- Participants: Shows all the Participants that have registered for the event in the central panel.
2. Event Date(s)
3. Registration Links: Links to register a team or a participant for the event.
4. Event Details
Note: Event Details feed automatically onto the landing page from the details entered for the event in GameDay, which can be found by editing an event and scrolling down to the Event Content section.
5. Team Login: Provides a login portal for Team Managers to manage their team details and participants. Click here for more information on the Team Admin Portal.
When logged in, this button allows team managers to:
- View their registered participants
- View a list of paid or unpaid payments from the team's participants
- Jump directly to the event Registration Form
- Switch Team portal if the user manages multiple teams
6. Central Panel: Surfaces relevant event information based on the selection made in the Navigation Menu.
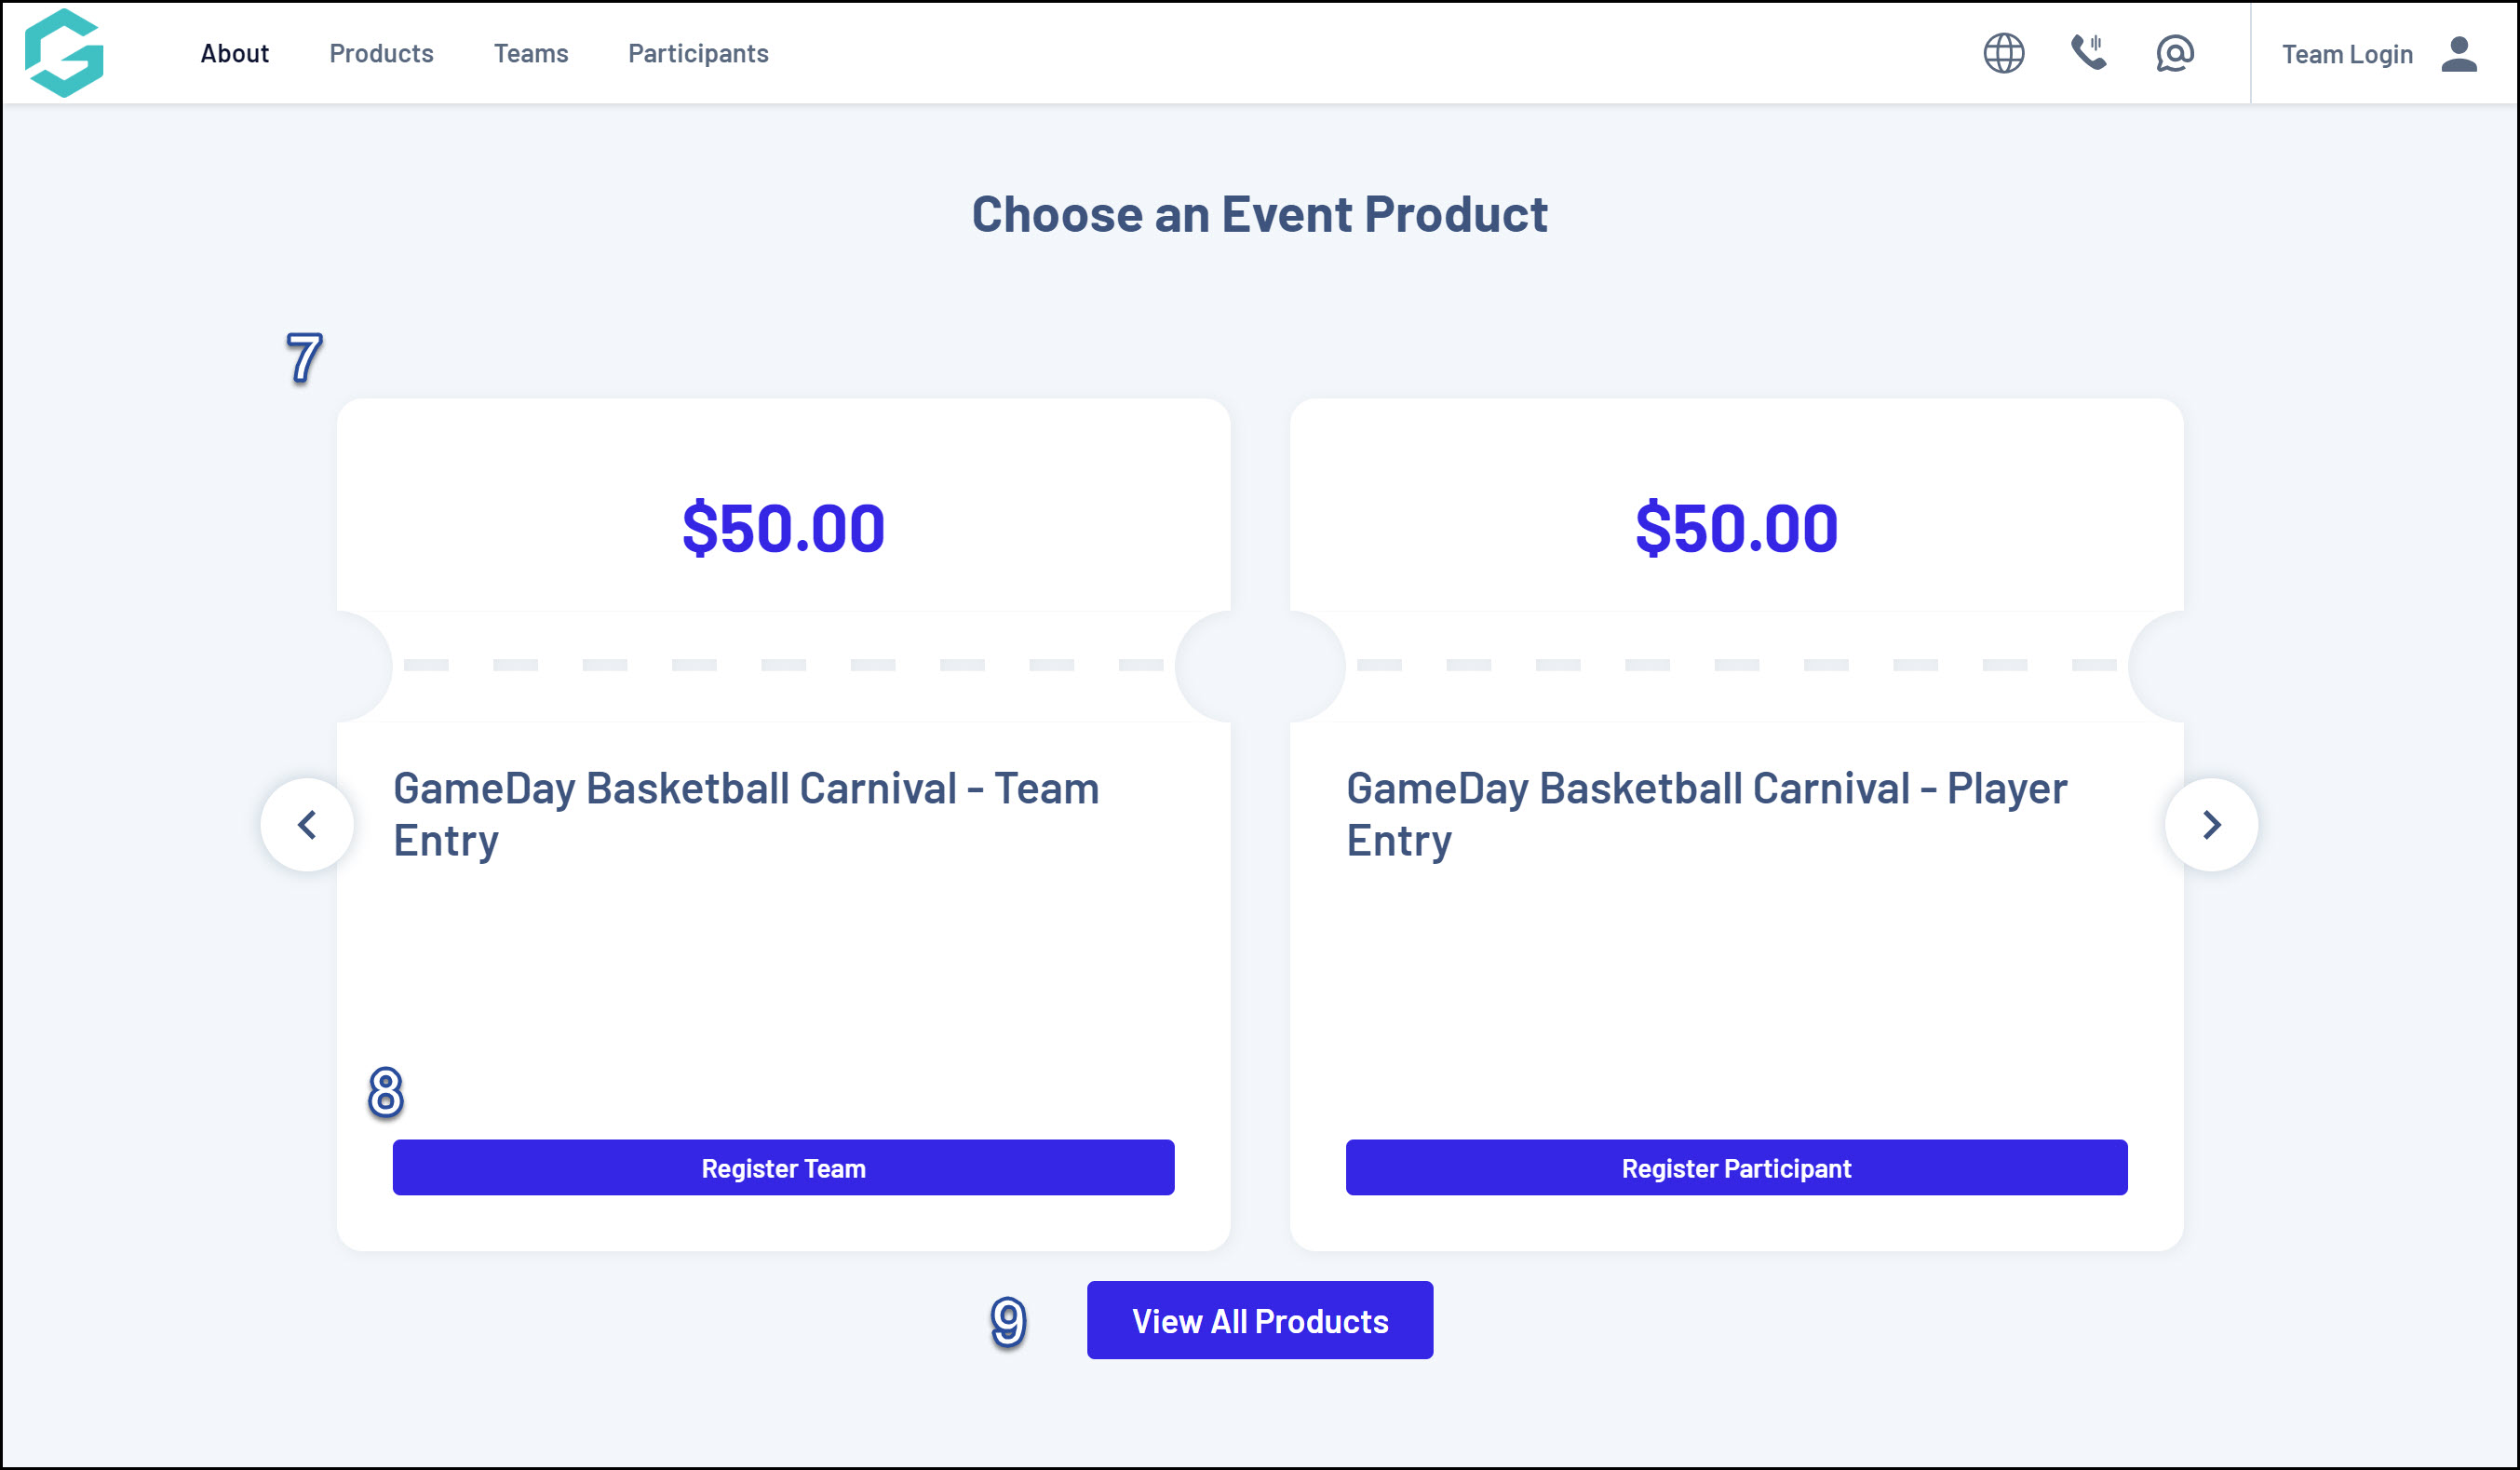
7. Event Products: Displays the products available in the event.
8. Register for Product: Links to register for the event and auto-select a specific product for teams and participants.
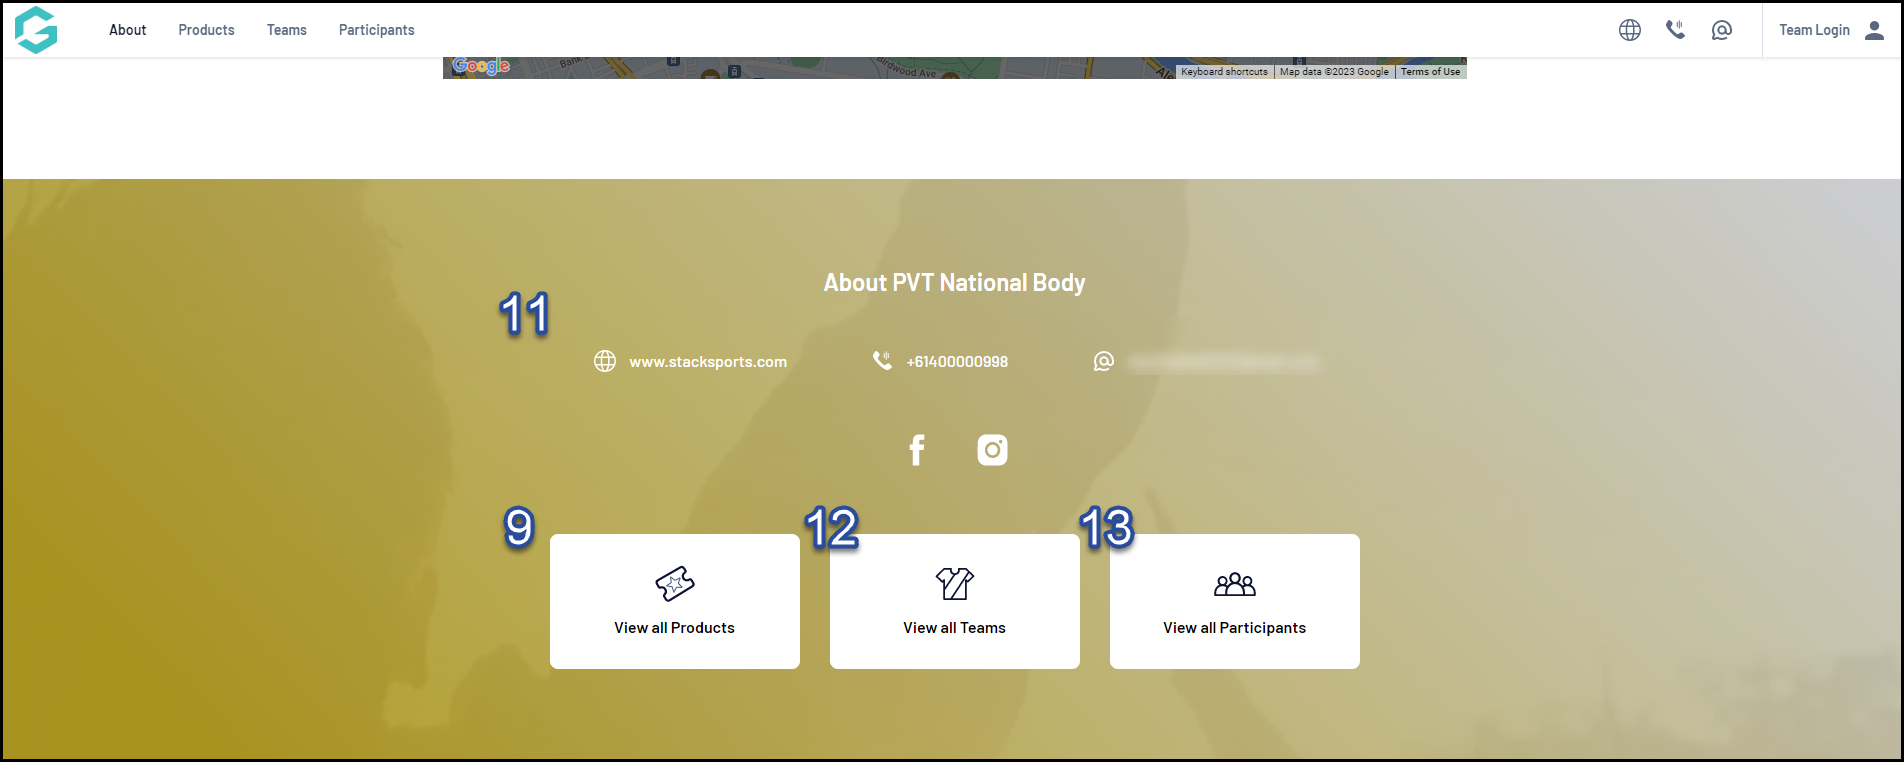
9. View All Products: Shows all available Products for this event on the central panel.
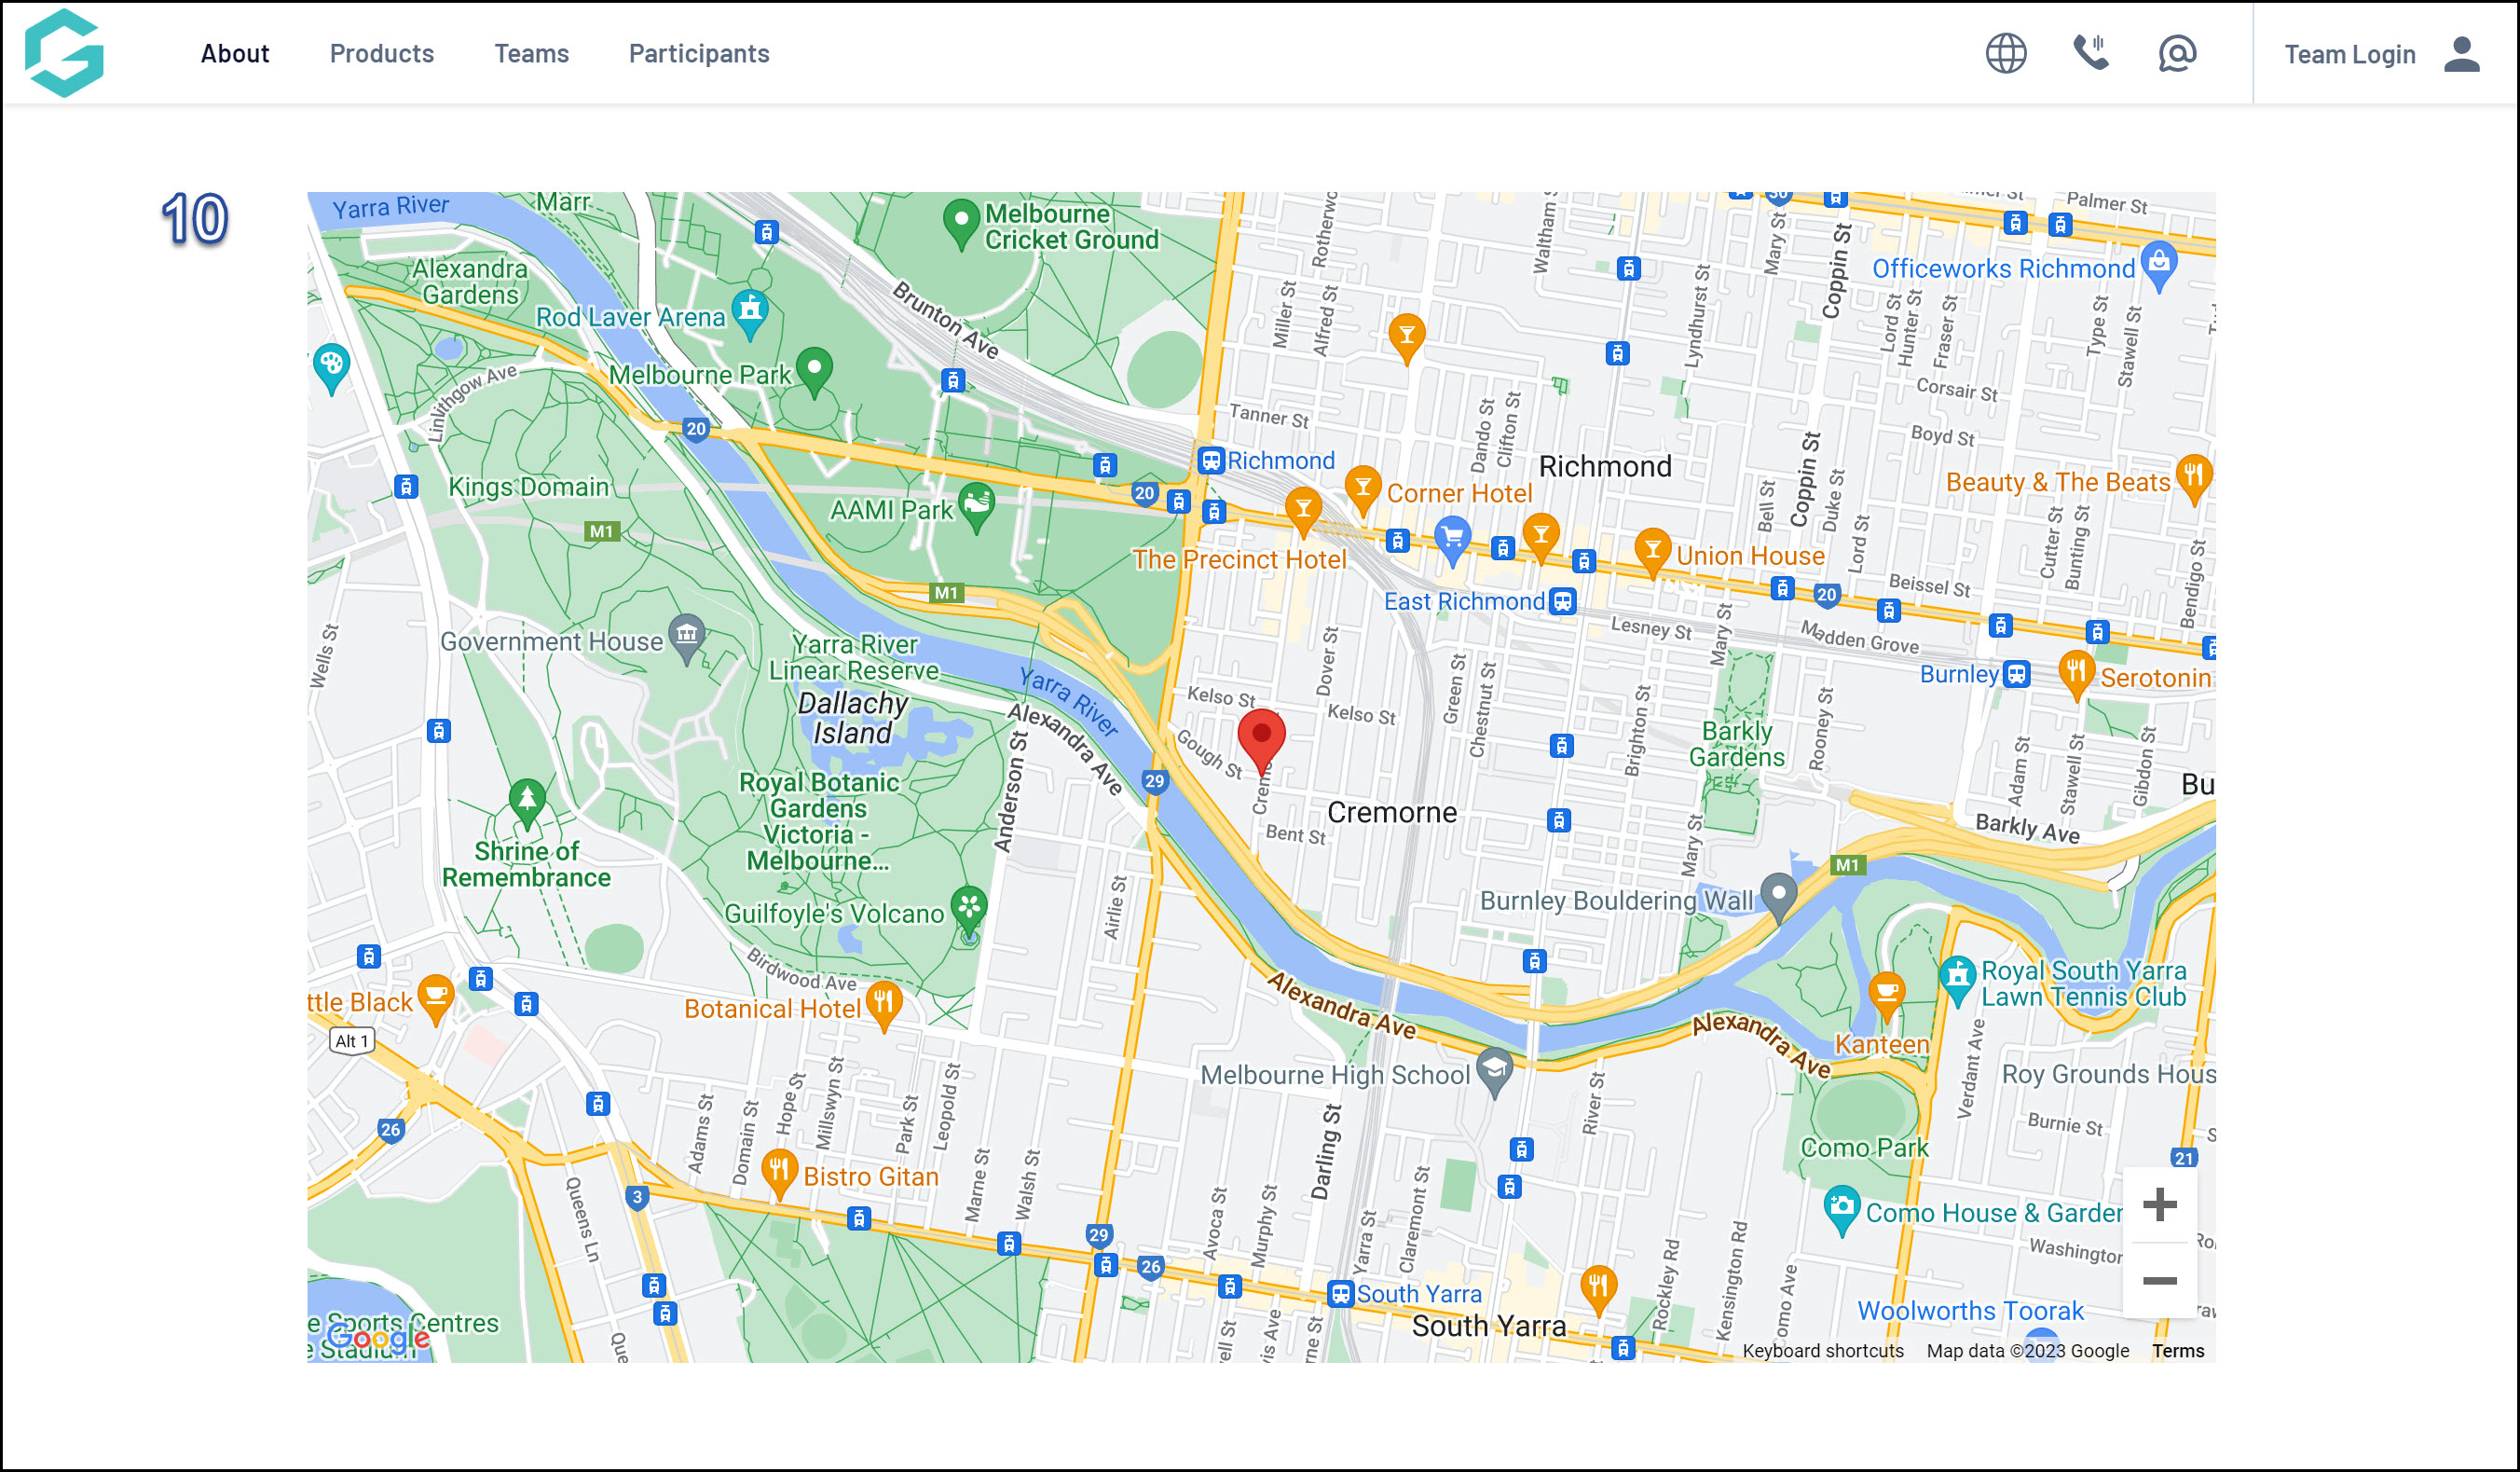
10. Event Location: Displays a map of your event address.
Note: The Event Location map is generated from the Event Address field within your event setup in GameDay, which can be found by editing an event and scrolling down to the Event Content section.
11. Organisation Details: Displays your organisation's website address, contact email and contact phone number.
Note: Organisation Details appear on your Landing Page automatically based on the information provided in your Organisation Details section in GameDay, which can be found through My Organisation > Organisation Details.
12. View All Teams: Shows all the Teams that have registered for the event in the central panel.
13. View All Participants: Shows all the Participants that have registered for the event in the central panel.
For more information on processes relevant to Team Events, please refer to the Related Articles section of this article.